


Summary
iOS update failed verification pops up on iDevice, iOS device can't updated to the latest iOS version with success. For Unable to Verify Update issue, you'd better to use the ways which can fix the Unable to Verify Update without losing data from the article.
The right steps to update iOS to the latest version are: Settings>General>Software Update, if there is one available new iOS version, iDevice will send the verification information to Apple server, the Apple server will verify the request, when iDevice is verifying update request, keep the WIFI connection. When the Apple server is downloading the latest iOS version package, the Download and Install button is available when the iOS package is ready, tap on it to download and install the latest iOS version to your iDevice.
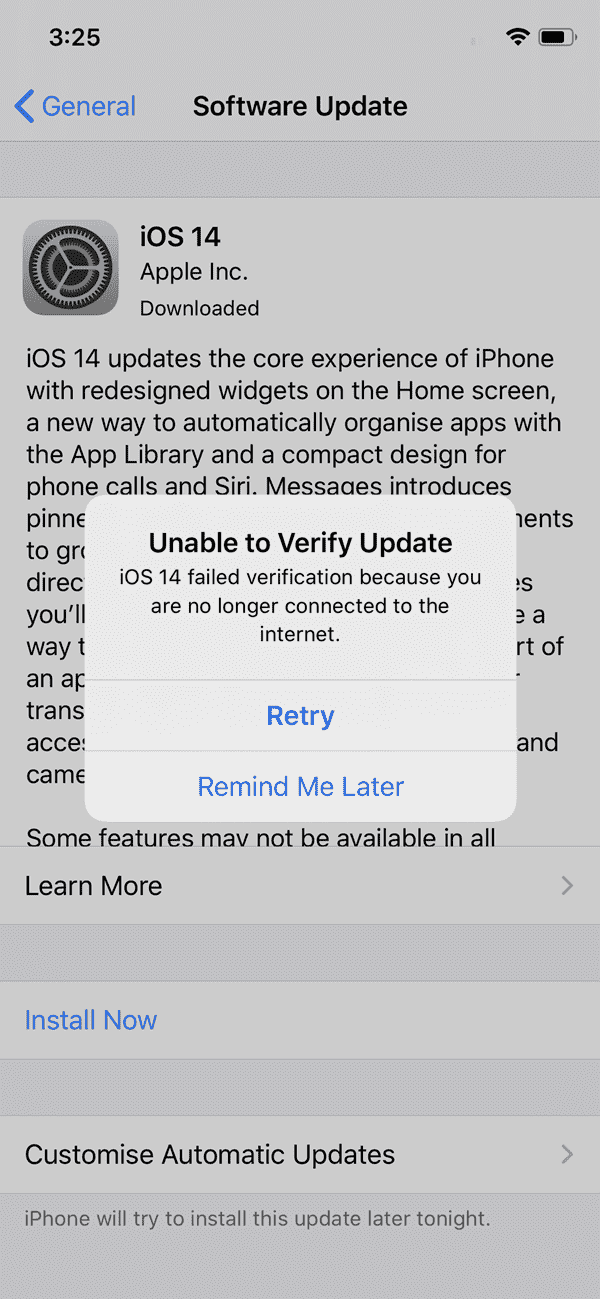
When you can't get the response from Apple server, the Unable to Verify Update notice pops up, the iOS update failed verification makes you take further steps to update iDevice to the new iOS version.
- Tip 1: Connect to the Internet
- Tip 2: Reset Network Settings
- Tip 3: Retry to Update iOS Software Later
- Tip 4: Reboot iDevice
- Tip 5: iTunes to Fix the Unable to Verify Update with Data Loss
- Tip 6: OSFixit to Fix the Unable to Verify Update Without Data Loss
Tip 1: Connect to the Internet
From the Unable to Verify Update notice, it mentioned that you are no longer connected to the internet, an internet connection is required to verify, go to Settings>WIFI or Settings>Cellular, connect to the stable and available network. It's better to test the network on another app before going to update iDevice software. Then go to settings to update iOS version to the latest one.
Tip 2: Reset Network Settings
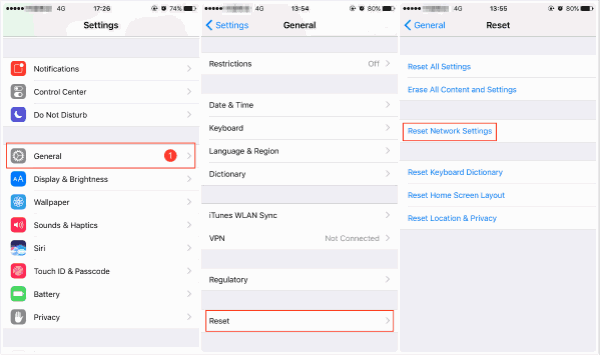
iPhone/iPad was connected to available internet, but the Unable to Verify Update notice pops also. Go to settings to reset network settings: Settings>General>Reset>Reset Network Settings. It's the quickest the way to erase all network settings on your iDevice. Then add the strong and stable network to your iDevice one more time.
Tip 3: Retry to Update iOS Software Later
You're sure that the network is strong and stable, from the Unable to Verify Update notice, tap on the Retry to update iOS software one more time. The wake network will make an iOS update failed verification also, so you can try several times to fix the Unable to Verify Update issue.
Tip 4: Reboot iDevice
After several attempts, the Unable to Verify Update notice pops up also. Hold the power button to reboot iDevice and then update the software from settings again.
Tip 5: iTunes to Fix the Unable to Verify Update with Data Loss
When iOS update failed verification pops up several times, there is another way to fix Unable to Verify Update and update iOS software with the help of iTunes, but you should know that all data in iDevice will be erased at the same time.
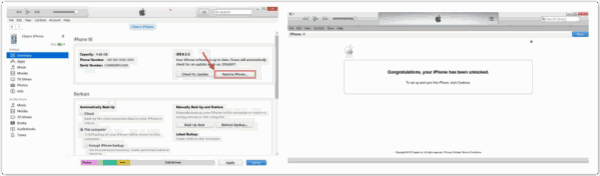
Plug iDevice to PC, launch iTunes, link iDevice to PC by unlocking iDevice and tapping on the Trust Computer button. From the Summary interface, tap on the Restore iPhone button to restore iPhone/iPad to the latest iOS version, at the same time, all data on iDevice will be erased then.
iTunes is one free and a good tool for Apple users, take advantage of iTunes to fix many iDevice system issues if all data on iPhone/iPad isn't important or you've backed up iPhone data in advance.
Tip 6: OSFixit to Fix the Unable to Verify Update Without Data Loss
In fact, we have many tips to update iOS software: updater iOS software from settings; update iOS software from iTunes; update iOS software from OSFixit, the first and the last methods are two way to update iOS software without losing data. When the Unable to Verify Update issue occurs, EelPhone OSFixit is the best way to fix it.
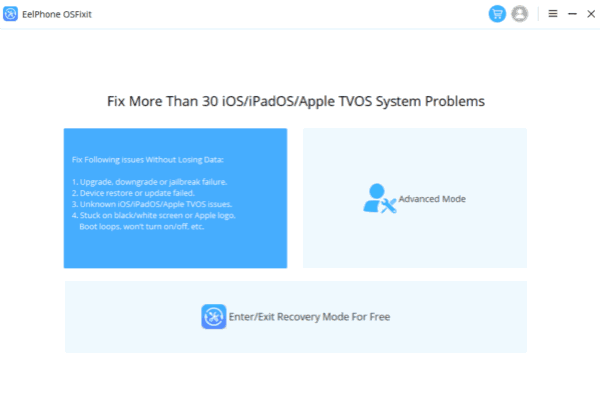
Step 1: Download EelPhone OSFixit to computer, from the first interface, the standard mode is the way to fix the Unable to Verify Update without erasing any data.
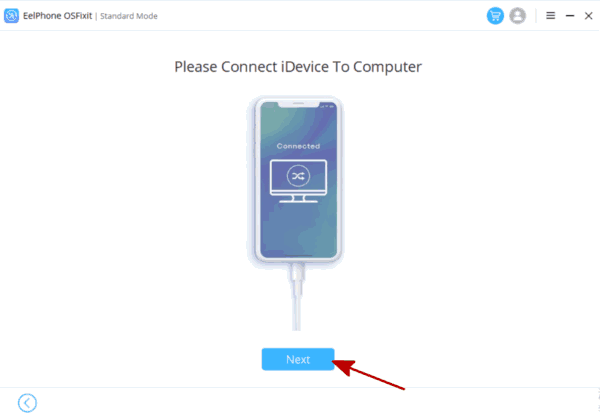
Step 2: Plug the Unable to Verify Update iDevice to PC using the original usb cable. If your iDevice can't be linked to the OSFixit automatically, just follow the guide on the tool to connect it to the tool manually.
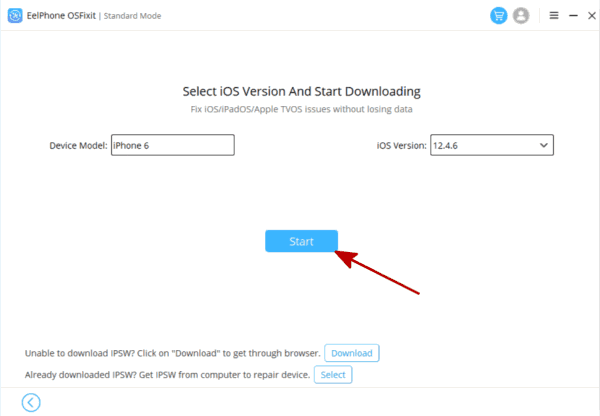
Step 3: There are many iOS versions you can update to, select one iOS version from the list. Select one and then tap on the Start button to download the corresponding firmware to fix the Unable to Verify Update issue.
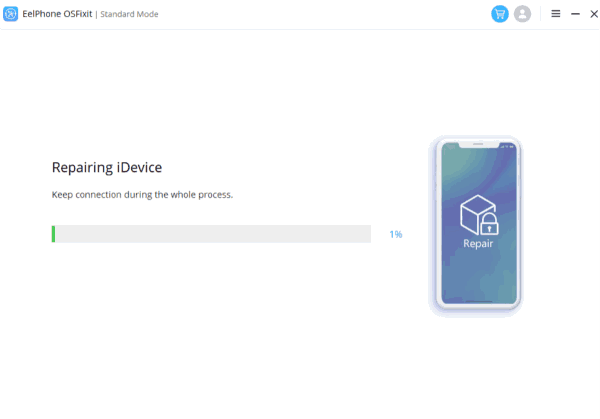
Step 4: It's automatic to download and unpack iOS firmware, just keep connection. When the firmware is ready, tap on the Repair Now button, it's the click to fix the Unable to Verify Update issue.

For the rest of the repair process after tapping on the Repair Now, what you should do is keep the connection and wait.
Those are all tips to fix the Unable to Verify Update issue of your iDevice. The free and no data loss tips are the first choice to fix the iOS update failed verification issue. When all free tips can't solve the issue, turn to EelPhone OSFixit, it's the best way to fix iPhone Unable to Verify Update without any data loss.
Alex Scott
This article was updated on 11 February, 2022

Likes
 Thank you for your feedback!
