


Summary
So many Blu Ray ripping software in the market, the best DVD Blu Ray ripper software is still EelPhone Blu Ray Ripper, import all videos/photos/audio you want to rip to the Blu Ray disc, you can even define the background of the Blu Ray ripper, within clicks, you can rip one Blu Ray DVD.
Blu Ray stored videos and audios with high quality, with its big storage space, BD was picked by DVD fans, you can by Blu Ray disc with the files you like, you can even rip one Blu Ray which is full of the videos/audios you would like to save. DVD Blu Ray ripper won't one mystery for us with the development of Blu Ray ripper.
Blu Ray creator is one software which can put all videos/audios to one empty Blu Ray disc on mac, it's one way to keep memories. For Blu Ray lovers, they prefer to create one Blu Ray rather than save it to the cloud or another hard drive. It's safer and more meaningful like the antique or artwork.
Different from long before, Blu Ray ripping utility looks like too technical to rip one Blu Ray at home, nowadays, just with Blu Ray ripper mac/windows, creating one Blu Ray disc full of the data you want to treasure.
Part 1: Free Blu Ray Ripper
Free Blu Ray ripper online may provide the way to rip Blu Ray disc without on penny, you can download it to have a try.
No pay no quality guarantee
The Blu Ray disc is for the high-quality videos/audios, with bigger storage space and smaller disc size, it's more portable. We would like to rip Blu Ray disc without losing data.
But for those who don't mind the quality loss after being ripped, just have a try with the free Blu Ray ripper.
Part 2: EelPhone Blu Ray Ripper
It's not one free Blu Ray ripper, but doesn't cost much either, which is the fast Blu Ray ripper software, with clicks you can rip Blu Ray disc with the high quality.
Features of EelPhone Blu Ray Ripper
1.Not only can rip Blu Ray, but also DVD disc.
2.High quality for your choice
3.Define the background of the Blu Ray as you like
4.Preview before paying
Follow the steps below to rip Blu Ray with ease.
Preparation:
1.One computer, windows or mac is available
2.One empty Blu Ray disc
3.All videos/audios you would like to rip to Blu Ray
4.Available network and enough power on your computer
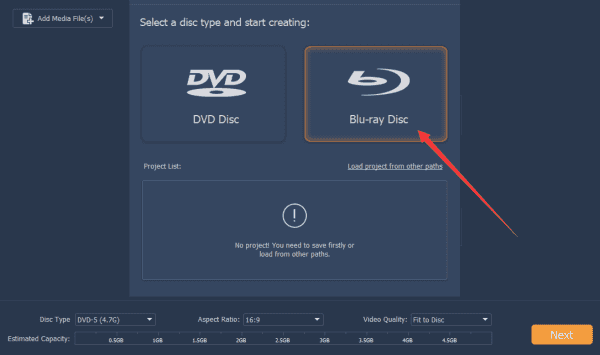
Step 1: Insert the empty Blu Ray disc to computer DVD drive from the right/left side, put it in the right position. Download EelPhone Blu Ray Ripper on windows/mac, install it with the installation guide. Click on Blu Ray Disc when pops the first window on the ripper.
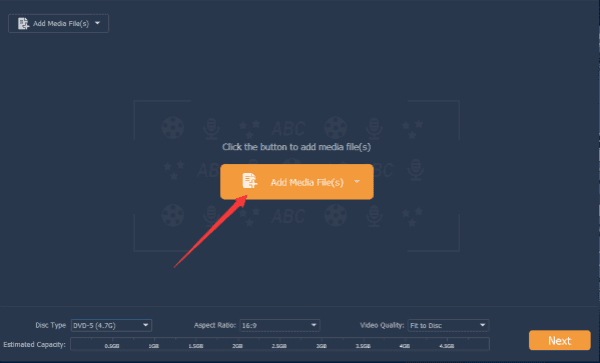
Step 2: Click on Add Media Files to import all files you would like to rip to the Blu Ray disc from your computer.
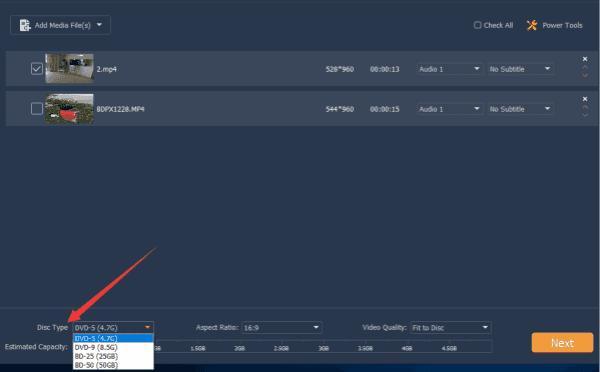
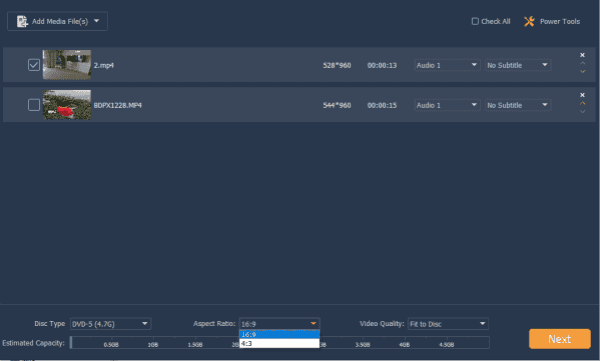
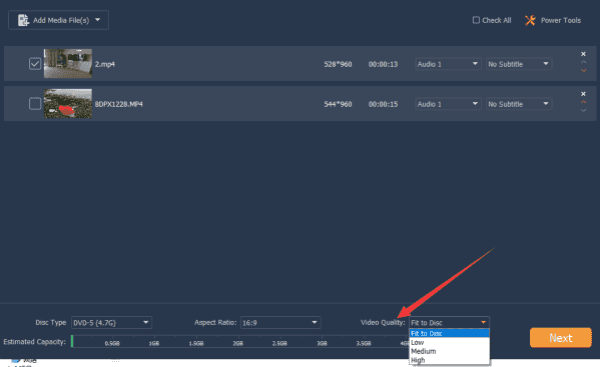
Step 3: Modify the settings of Blu Ray disc when all media files were drugged from computer:
Disc Type
According to the Blu Ray disc storage size, choose the exact disc type, and make sure that the empty Blu Ray disc has enough storage to rip all files you have imported from computer.
Aspect Ratio
Choose the aspect ratio from the list according to your hobby.
Video Quality
Normally, it's better to define the High, nice experience for high quality of the Blu Ray disc.
Step 4: Click on Next button to set up the interface of the Blu Ray disc, use the photos on the riiper, or you can import the photo from your computer as the Blu Ray disc interface.

Step 5: Background music, background photo from computer can be defined from the below of the ripper.
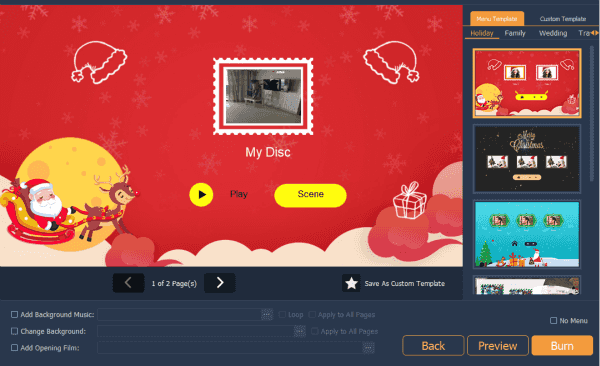
Step 6: Click on Preview button to have a look at the Blu Ray disc before clicking on Burn button.
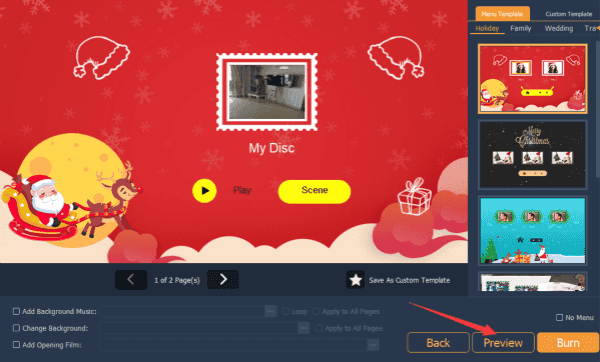
Step 7: When all is ready, click on Burn button to rip Blu Ray disc, take out the Blu Ray disc from your computer, then use it in the Blu Ray player.
For us, it's the fast and best Blu Ray ripper till now, you can try it at first.
Alex Scott
This article was updated on 30 December, 2021

Likes
 Thank you for your feedback!
